An animated short horror – From concept to screen
“A carefree backpacker returns home to find his family dead and horribly mutated. Things go from catastrophically bad to exponentially worse as he discovers the cause and that there may be no going back…….”
In early 2016 we embarked on production of an ambitious short animated film project, Nothing to Declare. The film was a collaboration between Interference Pattern, acclaimed comic artist Frank Quitely and Glasgow animation studio Once Were Farmers. Interference Pattern completed the aspects of production relating to the visual side of the film, including the cgi look development, full 3d asset creation followed by the cgi lighting, rendering and compositing and grade for the full film. Interference Pattern’s creative director Tom Bryant took on a role of both art and technical director for the film, using his almost two decades of industry experience to guide the films visual style. Our production partner Once Were Farmers, completed the pre-production design, edit, layout, rigging and animation, with Will Adams (studio owner at OWF) as the films’ director. World renowned comic book artist Frank Quitely was the writer and character designer with Mal Young of Studio Temba as the films’ producer.
The film tells the story of the return home to Glasgow of the lead protagonist, Chris, from his gap-year travels in South America, only to find his family in the grip of a terrifying transformation.
The films’ initial concept had been selected as one of the successful applicants to the SFTN – Scottish Shorts short film development and production programme in 2016 and was subsequently shortlisted and selected as one of the films to be commissioned for production, with a very modest production budget attached. To assist in making the film a reality some additional funds were raised via a crowd-funding campaign and the project was lucky enough to receive some corporate sponsorship from Glasgow-based business Primestaff. Even with these extra small injection of funds, as with many short film projects, most of the work would be self-funded by the studios involved.
The fantastical world that we were to create would be realised as a stylized interpretation of reality, with small-scale detailing enlarged and over-sized but object construction remaining as per real-world counterparts. Adding this layer of constructional realism to the 3d models would hopefully add to the viewer’s immersion and engagement within the visual world we were conjuring.
The characters were designed by Frank Quitely and environment and layout designs by renowned 2d and layout artist (and author of the wonderful history of animation layout, Setting the Scene), Fraser McLean. With the pre-production phases of the project being undertaken at Once Were Farmers, Interference Pattern’s involvement in the production really kicked off in earnest with the full 3d model builds.
Creating the Characters
First to be tackled as part of the 3d build were the characters. Working with some basic designs from Frank, we worked up the initial block-ins, quickly resolving and iterating these into the final 3d models. The characters were sculpted in Zbrush, a 3d sculpting software that attempts to give the artist an approach to 3d modelling that is more akin to real-world clay sculpting, with the interaction via a tablet and stylus, than the point-pushing of traditional 3d modelling. This approach tends to give character artists scope to create more detailed models in a shorter timescale and has revolutionised the approach to 3d character creation over the past decade.
After the characters were designed one of the elements that remained unresolved was how we would approach the characters hair. Complex hair shading models, hair fibre grooms and simulations are often used to virtually emulate the look and feel of real hair fibres. Whist these techniques can look fantastic we knew that they would be out of the scope of what we could achieve with this project’s budget. With this in mind we opted for a much simpler approach, with the hair being sculpted and rendered as a traditional solid 3d surface. This approach would be one of the stylistic choices that we have to make as a concession to being able to let us make the film but it was felt that the style was actually in-keeping with the hybrid visual target that we were attempting.
Creating the World
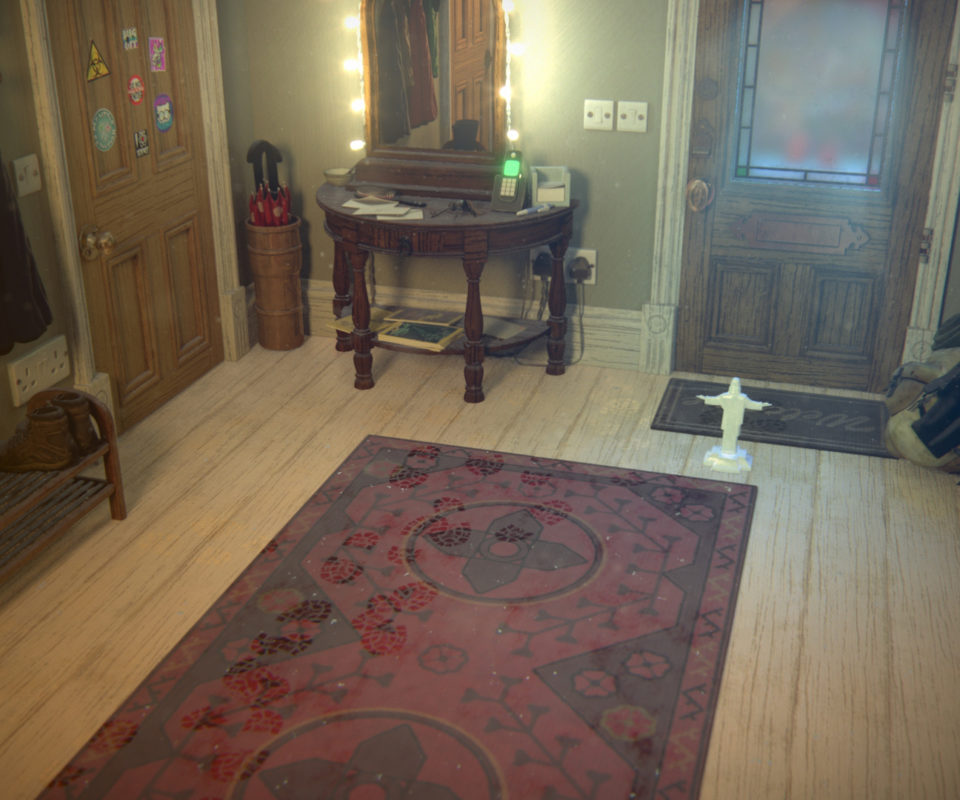
The location for the film is a traditional “tenement” apartment in Glasgow and as such we were to be re-creating a bespoke version of a common real-world layout and style of living space, albeit in stylized 3d. We split the environment build into separate rooms, with each one assigned to a different artist to take from concept through to a fully textured model. The first stage of any build is to block out the general proportions and scale of the model, additionally indicating the location and size of the main furniture items.
To aid us with this process we were provided a basic 3d layout from the director, which had been used to pre-visualise the cameras and general layout design for the film. Using this simple geometry as a guide, we were able to quickly build the room layouts and start to fill with the appropriately details items of furniture.
Great care was taken to ensure that we emphasised and up-scaled the correct details in our designs, such that we retained our stylised aesthetic whilst also maintaining the instant recognisably of the locations we were portraying. We wanted the viewers of the film to feel immediately at home within the environment and not to be distracted with any out of place design elements.
The workflow for creating the 3d environments is a multi stage process. Firstly we complete the 3d modelling, which involves creating the 3d meshes that form the virtual surfaces that we see on screen. We call these surfaces geometry, which is a term that encompasses various types of virtual surfaces used in CGI production. These surface types, whilst differing in their construction workflow, are ultimately normally comprised of many, many thousands of small triangular pieces called polygons, which the computer will render to generate the visual representation of the geometry.
Once the 3d modelling has been completed we have to assign all of the geometry what we call UV maps. These UV maps allow us to define how to wrap 2d textures, images or artwork, onto the surface of a 3d mesh. They do this by mapping each point, or vertex of the mesh to an associated point on a flat 2d area. This 2d area, or UV space is assigned to a piece of custom artwork, what we call a texture map, thus displaying a defined area of the texture to each polygon of the geometry. Whilst not the most creatively inspiring part of the 3d animation process, it’s vital to UV the mesh efficiently to maximise the area of the 2d texture map that we use, resulting in the sharpest possible display of the assigned textures once they are projected onto the 3d geometry and rendered.
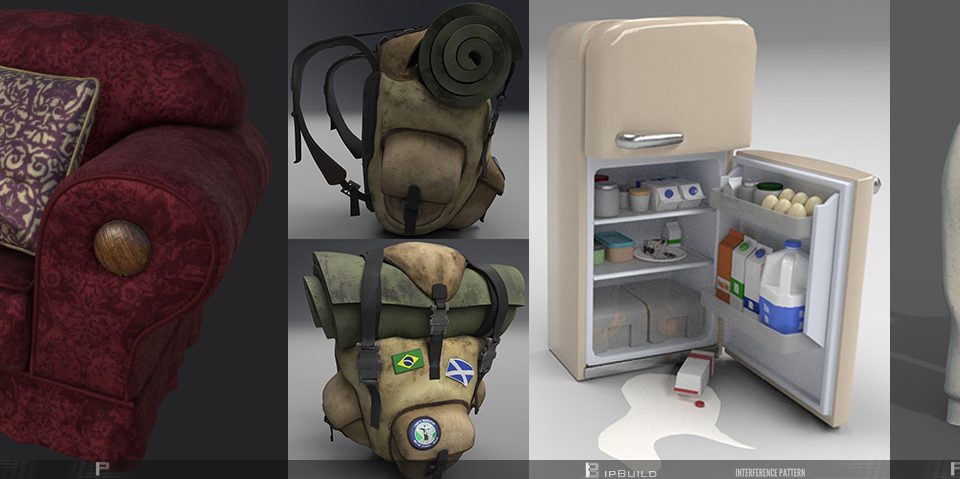
With the UV’s completed we moved onto the final stage of the model-building process, the texturing. As described already, this involves creating bespoke 2d imagery and wrapping that onto the surface of the model, in a specific manner, which is defined via the UV map, to give the geometry it it’s required colouration and appearance. It is what makes our wooden floorboards look like wood and the clothing of the characters like various materials. Not only do we define the colour of an object using texture maps, we also need to control how the object appears to react to light. For example we need to define how a surface shines and reflects, whether it has any illuminated or glowing areas and whether it is bumpy or smooth. We created separate texture maps to control all of these surface properties and more, combining them in what is called a shader within our 3d software. This shader ensures that the surface reacts to light in the physically correct way you would expect. Our wooden floorboards appear like shiny, bumpy wooden planks, as you would expect from a wooden floorboard. Using a mixture of 2d image editing software such as Photoshop and a specialised 3d texture painting software Substance Painter, we created hundreds of bespoke textures for all of the 3d models in the film.
Populating the World
The entire model build for the project comprised of six separate rooms (stairway, hallway, kitchen, living room, bedroom and exterior street), four characters and a multitude of smaller props items which were used to both populate the scenes but also act as animation props for the main character to interact with. These ranged from key set-dressing elements for the environments such as the bespoke nativity scene on the mantelpiece, to secondary items such as the stuffed unicorn toy, placed high up on a high shelf in the sister’s bedroom.
Lighting
With the 3d models and textures now complete we were able to commence the 3d look-development and lighting process. This is where we start to add specific lighting into a scene to illuminate the objects and create the desired look and mood. Without this most-important of stages the scenes would look completely dark. Our aim was to generate a preset template lighting scenario or setup, for each room, which would act as an initial platform into which the animated characters and final approved cameras could be imported. This would hopefully save us time during the lighting phase of production, avoiding unnecessary duplication of work. Continuity in visuals between separate shots within each room would also be ensured, as each shot would use the same initial base lighting setup.
Even using these base lighting setup templates in each shot as a starting point, bespoke edits would be made on a per-shot basis to ensure that each shot looked as good as possible and was not restricted by any limitations of the initial setup that were made apparent when rendered through a specific different camera.
Each room was to have a distinct lighting design to convey a particular mood, as per the director’s vision for the film. The living room for example was to feel like a “hellish” place, with the sisters bedroom scene at the end of the film turning a lurid clash of overly saturated pinks and greens to emphasise the confusion and disorientation of the now infected lead character.
Each shot went through several iterations to the lighting setup, with each aiming to improving on the one before, to change the feel and mood of the shot or let it better suit the narrative flow of the film. The lighting itself plays a large part in conveying the essence of the story.
Extra lighting is nearly always added to any characters, to enhance their look and presence on a per shot basis. Specifically additional rim-lighting helps to highlight the form and outline of the characters, pulling them from the surrounding background environment. Additional colouration in this lighting also can assist in emphasis of the mood. Without this extra attention with the lighting of the characters, they often look “flat” and uninspired, blending into the surroundings. The process is analogous to the extra lighting that would take place on a film set.
When the lighting setup of each shot had been completed, the full sequence of frames that comprise the shot were submitted for rendering on the studios in-house render farm. The process of rendering is when each image of the animation (there are 25 images per second) is generated by a computer which processes all the computations required to generate the final rendered imagery from the instructions set out by all of the processes and steps up to this point. Each image took hours to render, so to speed up the overall rendering process, we assigned the render jobs to our in-studio render farm, a stack of 40 high spec computers dedicated specifically to this task.
Once the 3d renders were completed the compositing stage involved taking the ungraded CGI renders, splitting them into the component layers, grading, tweaking and fixing before finally re-combining, along with any additional effects, to create the final desired image. Realistic camera artefacts, volumetrics and camera lens degradation effects were also added at this stage, to help to further enhance the visual feel of the shots.
Overall there were 78 shots in the film, each one requiring individual bespoke lighting and compositing, requiring many man-days of painstaking work, all combined to take the film from start to finish. The result is a beautiful looking film that we feel is sure to visually please.


